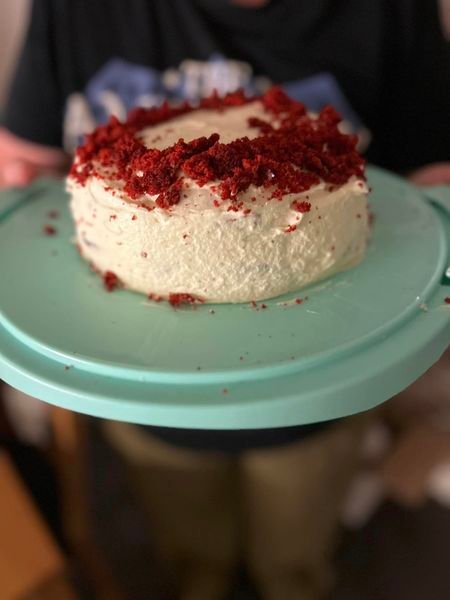
Camilla Hamid’s red velvet cake recipe is a modern twist on the classic Southern dessert, known for its vibrant red color, moist crumb, and mild cocoa flavor. Red velvet is often misunderstood as just a colored chocolate cake, but the balance of cocoa, buttermilk, and vinegar gives it a unique texture and flavor. Camilla Hamid, a renowned Swedish baker, has put her own touch on this recipe while keeping its traditional elements intact.
Ingredients:
For the Cake:
- 2 ½ cups (300g) all-purpose flour
- 2 tbsp cocoa powder (unsweetened)
- 1 tsp baking soda
- ½ tsp salt
- 1 cup (240ml) buttermilk
- 1 tbsp white vinegar
- 1 tsp vanilla extract
- 1 ½ cups (300g) granulated sugar
- ½ cup (120ml) vegetable oil
- ½ cup (115g) unsalted butter, softened
- 2 large eggs
- 2 tbsp red food coloring
For the Cream Cheese Frosting:
- 8 oz (225g) cream cheese, softened
- ½ cup (115g) unsalted butter, softened
- 4 cups (500g) powdered sugar, sifted
- 1 tsp vanilla extract
- Pinch of salt
Step-by-Step Instructions:
1. Prepare the Cake Batter
Start by preheating your oven to 350°F (175°C) and greasing two 8-inch round cake pans. Dust the pans with a light layer of flour to prevent sticking. In a medium-sized bowl, whisk together the flour, cocoa powder, baking soda, and salt. Set this aside, as these are your dry ingredients.
In another bowl, mix the buttermilk, white vinegar, and vanilla extract. The vinegar and buttermilk are key ingredients that give red velvet its classic tang and tender crumb. The acidity from the vinegar reacts with the baking soda, resulting in a light and fluffy texture.
In a larger bowl, combine the granulated sugar, vegetable oil, and softened butter. Using an electric mixer, beat the mixture on medium speed until it is smooth and fluffy. This step ensures that the sugar is properly incorporated into the fats, creating a moist cake base. Then, add the eggs one at a time, making sure to beat well after each addition. The eggs help bind the ingredients and contribute to the cake’s structure.
Next, add the red food coloring into the sugar mixture. Camilla Hamid’s recipe calls for 2 tablespoons of food coloring to achieve that signature deep red hue. Feel free to adjust the amount based on your preference for color intensity.
Gradually incorporate the dry ingredients and the buttermilk mixture into the batter, alternating between the two. Start by adding one-third of the dry ingredients, mix, and then add half of the buttermilk mixture. Repeat this process until everything is just combined. Be careful not to overmix the batter, as this can result in a dense cake.
2. Bake the Cake
Divide the batter evenly between the prepared cake pans. Use a spatula to spread the batter into an even layer, ensuring that it reaches the edges of the pans. Tap the pans gently on the countertop to remove any air bubbles.
Bake in the preheated oven for 25-30 minutes, or until a toothpick inserted into the center comes out clean. The cakes should spring back slightly when touched in the center. Once done, remove the cakes from the oven and let them cool in the pans for about 10 minutes before transferring them to a wire rack to cool completely.
3. Make the Cream Cheese Frosting
While the cakes are cooling, prepare the cream cheese frosting. In a large mixing bowl, beat the softened cream cheese and butter together until smooth and creamy. This step ensures that there are no lumps in the frosting, giving it a silky texture.
Gradually add the powdered sugar, about 1 cup at a time, mixing well after each addition. The frosting should become fluffy and light as you incorporate the sugar. Finally, add the vanilla extract and a pinch of salt to balance the sweetness.
If you prefer a stiffer frosting, add more powdered sugar until you reach the desired consistency. Cream cheese frosting is quite versatile, and you can adjust the sweetness based on your taste.
4. Assemble the Cake
Once the cakes are fully cooled, use a serrated knife to level the tops if needed. This will make the layers stack more evenly. Place one cake layer on a serving plate or cake stand and spread a thick layer of cream cheese frosting on top. Be generous with the frosting to get a nice, rich layer between the cakes.
Place the second layer on top and repeat with another layer of frosting. Use the remaining frosting to coat the sides of the cake, creating a smooth finish. You can leave the frosting simple and rustic, or you can go for a more polished look by using a cake scraper or spatula to smooth out the edges.
Final Touches
Camilla Hamid’s red velvet cake can be decorated in various ways depending on your preference. For a classic touch, sprinkle some cake crumbs from the leveled tops onto the frosting, or add a few fresh berries for color contrast.
This red velvet cake is perfect for celebrations or simply indulging in a classic treat. The combination of the tender cake and tangy cream cheese frosting creates a flavor that is both rich and balanced, making this recipe a delightful crowd-pleaser.
